Showing posts with label Stampin' UP. Show all posts

Monday, August 22, 2011

RI SOTW - Puffins

We have a new Stamp of the Week over on Repeat Impressions' blog,  The House That Stamps Built and it's this sweet image of three Puffins (2711-I).  For my sentiment, I used You Make me Smile (8602-E) from Quartet Complements. The patterned papers I used are from Stampin' UP!'s Haiku collection and Cosmo Cricket's Material Girl collection. 

The papers were selected to go along with this week's Just Us Girls color challenge, which is to use Chocolate Chip, Deep Yellow, Riding Hood Red and Olive Green.  The layout for my card is from this week's Card Positioning Systems sketch (I won last week's CPS challenge by the way!)  #232.

Please make sure to hop over to The House That Stamps Built for the details on getting this week's Puffins stamp for half price and to see the cards the rest of the team has made using this great image!

Thanks for stopping by!

Saturday, July 24, 2010

Wedding Wishes


Today we are going to Tim's nephew's wedding, so obviously I needed to make a card!  I knew I wanted to use this cake from Flourishes' Let them Eat Cake set.  It's supposed to be a birthday set, but to me this cake looks more like a wedding cake.  I paired it with Stampin' Up's Bella Bleu papers, which I thought went well with the flourishes in the cake image, and that set my color scheme. 

The cake layers were stamped with a combination of Versamark and Stampin' Up Blue Bayou, then heat embossed with clear embossing powder.  The sentiment, stand and banner (from an old Fiskars clear set called Romance) were all stamped using Versamark and then heat embossed using Powder Keg Metallic Marble embossing powder.  The background for the sentiment tag was airbrushed.

I cut the image out and mounted the bottom layer using a double layer of foam tape, then mounted the middle layer with a single layer of foam tape and the top layer was mounted using Stampin' Up dimensionals, which are thinner than the foam tape.  You can see the dimension in the photo to the right.

I finally tried the scrunched up ribbon technique that seems to be showing up all over blog land.  I placed a strip of ScorTape down on the my patterned paper and then started scrunching the ivory satin ribbon and adhering it to the tape.  I had run the ribbon through the ends of the sentiment panel before I started.  Finally, I added some flat back pearls.

For the inside, I kept it pretty simple and just stamped the heart, from the Fiskars Romance set, and the sentiment, from Papertrey Ink ETA: Flourishes' Tag Lines set, and heat embossed with the Metallic Marble powder. 

Thanks for stopping by!  Enjoy your weekend!

Sunday, February 14, 2010

Love You Berry Much!

Sorry it has been so quiet around here lately. Work and life get in the way of blogging sometimes.

This is a quick little card I made for my mother and her husband for Valentine's Day. She has collected strawberries for as long as I can remember, so whenever I see them, I think of her. The stamps are all from Papertrey Ink (My Punny Valentine and Vintage Labels) and the strawberry paper is from BasicGrey's Nook and Pantry collection. The ribbon is from Stampin' Up.

Hope you had a happy Valentine's Day! Thanks for stopping by! Check back on Wednesday for another Belli Challenge! Enjoy your week!

Monday, January 4, 2010

Thanks so much!


Now that the holidays are over, 'tis the season for Thank You cards!

I made this one using the SK121909 sketch over at Paper Craft Planet. The patterned paper is from Scribble Scrabble's Lullaby of Birdland collection. I love the bright colors in it. The peacock stamp is from Alpha Stamps' Eastern Doodles and I thought it paired nicely with the paper.

The image was colored with Copic markers and the sentiment tag was cut out using a Spellbinder's Fancy Tags die, then sponged with Adirondack Salmon dye ink. The faux stitching was added using a Spica pen.

Please check back on Wednesday for another Belli Challenge! Thanks for looking!

Monday, December 21, 2009

Snowy Birthday Wishes


I made this card using Mercy's sketch from last week, and it also fits for this week's Our Creative Corner challenge, which is to use snow or snowflakes on your card. Um, I think I've got that covered - on the card AND the envelope!

The papers are from a Christmas paper stack and all the stamps are from Stampin' UP!. The gold snowflake is a clear Heidi Swapp snowflake that I colored with a gold paint pen. The blue one in the upper right corner was also clear and I colored it with a Copic marker. I added a couple of pale green Kaiser Pearls to the centers of the two larger snowflakes. That's about it.

Are you all ready for Christmas?? I'm STILL working on Christmas cards and have one more gift to wrap up and mail (obviously it's going to be late....). Enjoy your week and be sure to check back on Wednesday for another Belli Challenge!

Tuesday, December 15, 2009

Damask Happy Birthday


Let me start off by apologizing for the lousy photo of this card - I couldn't get it focused properly, but I'm desperate for things to post, so here it is!

I decided to give last week's CAS color challenge another go, this time making more of a Clean and Simple card, although I'm still not sure I succeeded in that department. At any rate, the red and white damask paper is from Stampin' UP! and it immediately reminded me of the Papertrey Ink Damask Designs set that I've had for ages and never inked up. They are a perfect match! Then I remembered the Textile Cuttlebug folder and embossed my background paper with that.

The sentiment is also from the Damask Designs set. I stamped it on vellum hoping I could layer it over the middle of the damask image, but it didn't show up well enough, so I layered it on a white ribbon tag instead. I added a couple of buttons, a glittery flower, a few red rhinestones, some faux stitching and some Martha Stewart baker's twine and there you have it! The sketch is from last Friday's Weekend Sketch Challenge 110.

Hope you're having a good week. I'm in full blown panic mode for Christmas, so things will probably be a little quiet here! Thanks for looking!

Thursday, December 10, 2009

Winter Happy Birthday


I made this card for two challenges - the JUGS10 sketch challenge and this week's CAS44 Color Challenge which was to use red, brown and white or cream. Of course, this card isn't exactly Clean and Simple....but at least I got the color part right!

The background paper is from a Christmas paper stack and the brown paper is from Stampin' UP!. I stamped my snowflakes (from Stampin' UP!) and the bird image (from Inkadinkado) on the brown paper with PTI's Vintage Cream ink and then added some Stampendous glittery embossing powder and heat embossed. I added the red dots around the scalloped edges with a red Spica pen for a little more sparkle. The velvet ribbon is from Cosmo Cricket and the striped ribbon is from Stampin' UP!

That's about it! Thanks for looking!

Wednesday, December 9, 2009

Belli Challenge #80 - Flourishes


It's time for another Belli Challenge! This week's challenge is flourishes. I've got this one covered! My patterned paper has flourishes, my chipboard piece is a flourish AND it's stamped with flourishes, my stamped image has flourishes AND my sentiment not only has flourishes, but it's from Flourishes' Flourished Words set! I used Mercy's MTSC50 sketch from last week as my starting point. The patterned papers are Stampin' UP!'s Razzle Dazzle collection and the flower stamp is from the set of the same name. The card stock is all SU's current In Colors.

I colored my stamp with the In Colors markers in Melon Mambo, Rich Razzleberry and Crushed Curry, plus Old Olive for the stems, and then I went over my flowers with a clear Spica marker and added yellow rhinestones to the center of each one. I used a Fiskars border punch to punch the edge of the Melon Mambo cardstock and then used the little flower pieces up in the right corner, with pink rhinestones added to the centers of both the positive and negative flowers.

BIG news - we are looking for a few new members to add to the Belli Challenge design team! If you're interested in applying, please check out yesterday's post over on the Belli blog. Submissions for the design team are due by January 3, 2010 - we hope you'll apply!

Please be sure to visit the other Belli girls' blogs and see what they have done this week (links to their blogs are over on the left sidebar)! Also be sure to see what our guest designer, my fellow Krafty Kat, Jenny Gropp, has created for this week's challenge.

To play along with us, create a card or project using flourishes, share your link with us using Mr Linky on today's Belli blog post. If you post to SCS or PCP or any other online gallery please use keyword CBC80 so we can find it.

Thanks for looking! Enjoy the rest of your week!

Monday, November 23, 2009

Happy Bird-day!


Happy Monday! Here's a quick birthday card I made recently using a couple of Memory Box stamps. The image was colored using Koh-I-Noor colored pencils and then blended with Gamsol. The patterned paper is Bo Bunny Harvest Table. The card stock and ribbon are from Stampin' UP! The tag for the sentiment was made using a Fancy Tags die from Spellbinders.

That's about it! Hope you had a nice weekend. Enjoy this short week and please stop back by on Wednesday for another Belli Challenge!

Wednesday, November 11, 2009

Belli Challenge #78 - Christmas with Creative Cuts & More

Welcome to another Creative Belli Challenge! We are once again being sponsored by Creative Cuts & More this week. CC&M just released two new kits - the Treasured Family Recipes 8"x8" Mini Album Kit and the Holiday Treats Apron Recipe Album Kit. As part of the celebration CC&M will be having a great sale. For the next three days, CC&M will offer 20% off the entire store. But act quickly, this sale will end on November 14th. Be sure you enter this code - recipebloghop2009 - during checkout.

The challenge this week is to use Christmas themed embellishments (buttons, ribbon, stickers, whatever). For my project, I started with the Card Portfolio in Emerald Stardream Shimmer. Those of you who have followed my blog for a while know that I have done several card folders before and I have to say that using this card portfolio die cut was a whole lot simpler! I highly recommend it - it comes pre-cut, pre-scored and it even has slits for the ribbon tie cut for you. All you have to do is fold it up, tape the inside pockets and decorate the front!

I covered the front with three strips of Cosmo Cricket's Jolly by Golly paper, and then I added Snowflake #04 Small, cut from Tacky Tape. I stamped my snowman from Papertrey Ink's 2009 Holiday Tag Collection and cut it out using a circle die, then matted it on a scalloped circle cut from Stardreams Stationery, which perfectly matched my card folder. The matted snowman was placed on the snowflake die cut, leaving some of the Tacky Tape exposed so I could dump some Polar White Flower Soft on top (click on the photo to see it larger). The tape is really tacky, just like the name implies, so the Flower Soft sticks to it really well. You could also use glitter or flocking.

The red label is also from Creative Cuts & More and is the Antique label in Mars Stardream Shimmer paper. My sentiment was cut out using a Labels Six Nestabilities die, which fit nicely on top of the Antique label. I added a few rhinestone snowflakes from Memory Box to continue my snowflake theme.


For the inside of the card portfolio. I decorated the pockets with the same papers I used on the front, plus a couple of Stampin' UP felt snowflakes, topped with some more of the rhinestone snowflakes. I've finished two cards to go in it so far, and am planning on making a couple more so I can give it as a Christmas gift.

Be sure to visit the rest of the Creative Belli Design Team members' blogs (links are on the left sidebar) to see which Creative Cuts & More products they used. Play along with us by making a card using a Christmas themed embellishment! Link your project using Mr. Linky on today's Creative Belli Challenge Blog post. If you upload a card to Splitcoast Stampers or Paper Craft Planet, be sure to use CBC78 in the keywords section. The winner of this week's challenge will receive a TREASURED FAMILY RECIPES 8" X 8" MINI ALBUM KIT from Creative Cuts and More!
Thanks for looking! Sorry for the novel!

Today I'm going to have lunch with some very special stamping friends and then we're all going on a shopping spree to Archiver's! Come back later in the week and hopefully I'll have a photo or two to share!!

Wednesday, September 30, 2009

Belli Challenge #75 - Shirleys2Girls


It's time for another Belli Challenge! This week's challenge is to create a card, scrapbook page, or project using Halloween colored glitter or bling. Our sponsor this week is Shirleys2Girls, who provided the Belli design team with this digital image of Mazie. This is the first time I've used a digital image, so this was a good challenge for me! Please be sure to check out what the other Belli Challenge girls have done with Mazie!

I printed the image on Cryogen White paper using my ink jet printer and colored her using Copic markers. The sentiment is from Stampin' UP! and I colored directly on the stamp with brown, purple and orange markers. Both images were cut out using Nestabilities and I used an orange marker to outline the image while it was still in the die. I also added some glitter by going over portions of both images with Copic Spica pens.

The glittered background papers are from Best Creations' Trick or Treat collection and the bat in the corner is from May Arts' Satin Cutouts collection.

For the inside of the card, I used another Stampin' UP! sentiment, a scrap of the Halloween Stripe paper from the front of the card and another ribbon bat.

To play along with us, create a card or project using Halloween colored glitter or bling. The lucky winner for this week's challenge will receive a Halloween Stamp Set from Shirleys2Girls!

We can't wait to see what you come up with. If you post to SCS or PCP or any other online gallery please use keyword CBC75 so we can find it. Don't forget to add a link to your project using Mr. Linky on today's post on the Belli Challenge blog.

Thanks for stopping by!

Friday, September 18, 2009

Krafty Kat Knick Knacks

I have mentioned here before that I am in a stamp group called the Krafty Kats and each month one of us puts together a kit of paper and embellishments for each of the group members. We use the supplies in the kit to make as many projects as we can before our next get together. At each of our monthly get togethers, we 'show and tell' what we've all worked on since the last time we got together.

This month it was my turn to put together the kit. The environmentalist in me has been frustrated by all of the Ziploc bags we use each month to package all of the embellishments in, so I decided to make something we could re-use each month for our embellishments.

I selected one of the papers from last month's kit (Chatterbox Beach House Light Stripe), my Just Rite Stampers Trompe Script font and six acrylic boxes that some of my Papertrey Ink stamp sets were packaged in and made a matching set of six 'Krafty Kat Knick Knack' boxes for us to use and re-use. The photo shows the altered box, with the embellishments from this month's kit.

For the label, I stamped the small Cat Face image from Make an Impression stamps in So Saffron ink from Stampin' UP!, then I stamped the Just Rite text on top in Night of Navy ink. I cut the labels out using a Labels Four Nestabilities die and then used a So Saffron marker to color the outer edge. I finished it off by adding the dots with a navy marker.

Hope this gives you some ideas for re-purposing some of the packaging that comes with your stamping supplies! Thanks for looking! Have a great weekend!

Wednesday, September 16, 2009

Belli Challenge Wednesday - #74 Fall or Halloween theme

This week's Belli Challenge is to create something with a Fall or Halloween theme. We have a great sponsor for this challenge - Creative Cuts and More. Creative Cuts & More is a leader in the die-cutting industry. They have a huge variety of bags, boxes, cards and shapes, that are offered in chipboard, acetate, felt, foam, shrink plastic, velvet paper and name-brand card stock including Bazzill Basics, Bazzill Bling, Stardream, Curious, and DoubleMates. They provided the Creative Belli Challenge design team with our choice of die cuts, and we all had a lot of fun playing with them! You really need to check out some of the other girls' projects - they're terrific!

For my card, I selected the Arch Window card in orange Bazzill Textured card stock and the Velvet Paper Witch on Broom die cut. I started by adhering a layer of acetate on the inside of the window (which makes it hard to get a good photo....), then I placed the moon and witch where I wanted them and adhered them to the shimmery blue paper background. The background was cut a little larger than the acetate sheet and adhered behind it. The moon is a 1 1/2" circle cut from Papertrey Ink Gold card stock. For the sky background, I used a sheet of Slate Blue Millennium Paper from Japan from Marco's Paper (sorry, I can't find it on their site, so they may not carry it anymore).

For my sentiment, I used a stamp from Northwoods Rubber Stamps, but only stamped the first line of it for the card front. I cut that out using a Spellbinder's Double Ended tag die, and airbrushed the background of it using a pale yellow Copic marker. The black pearls are from Kaisercraft.

For the inside of the card, I stamped the second line of the sentiment and cut it out using a Stampin' Up! word window punch, then layered that on a piece of the Millennium Paper that was cut out using the Modern Label punch from SU!. I stamped the second sentiment, from Repeat Impressions, directly on the card liner.

To add a bit of shimmer, I went over the sentiment on the front and the 'Ride it!' on the inside with a Pitch Black Copic Spica pen.

Be sure to go to the Belli Blog to view all the great projects for this week's challenge. While you're there, check out the prize that our sponsor, Creative Cuts and More is providing for this week's challenge!

Thanks for stopping by!

Sunday, September 13, 2009

Happy Birthday, Mom!


Many years ago, a group of my mother's friends nicknamed her Rose, because she always comes up smelling like a rose! As a result, I have amassed a collection of card making supplies that have a rose theme. For my mother's birthday, which is today, I made this very rosy card.

The roses are from a sheet of 3D decoupage flowers that are die cut in successively smaller layers. They come in black and white with silver or gold accents. The sheet I used had the silver accents and I colored them with a combination of Copic markers and chalks. The paper has a glossy finish, so the Copics don't blend well, but adding the chalk on top while the alcohol from the markers was still a little wet helped to smooth out the stroke lines a bit.

This shot gives you an idea of how the different layers are stacked up.
The patterned papers are all Stampin' UP!'s Bella Rose collection, the sentiment stamp, striped ribbon and crocheted flowers are also from Stampin' UP!.

For the envelope, I used the same papers, but stamped the smaller rose from SU's A Rose is a Rose set (see, I told you I have a lot of rose-themed supplies!), cut it out and popped it up to fill in a white spot on the patterned paper.

It's a bit over the top, but hopefully she'll like it!

Happy Birthday, Mom! We love you!

Wednesday, August 19, 2009

Belli Challenge - Peachy Keen Stamps

Happy Wednesday! Hope your week is going well so far! Today is another Belli Challenge and this week our challenge is to use water based markers - NO Copics! Uggghhh - now that really is a challenge, as I learned the hard way! Our challenge this time is sponsored by Peachy Keen Stamps and the winner will receive a $25 gift certificate from Peachy Keen.

Each of the Belli design team members was provided three Peachy Keen images to choose from for this challenge. I selected Sleeping Teddy and decided to make a baby card with a vintage feel. The designer papers I used are from Graphic 45 (Baby and Bride Collection - Unforgettable) and Stampin' UP! (Juntos). My card layout is based on 2 Red Bananas' sketch from Sunday.

I colored the image with Stampin' UP and Zig Beach House watercolor markers and added some sparkle with a clear Spica pen on the hat, blanket and star. The diaper is covered with Doodlebug Designs flock and I added a Tim Holtz mini safety pin. The ribbon is American Crafts Elements.

Be sure to check out what the other Belli Challenge girls have done with these cute images:


To play along with us, create a card or project using only WATER BASED MARKERS ~ NO COPICS, and share your link with us using Mr Linky below today's Belli Challenge post. We can't wait to see what you come up with! If you post to SCS, PCP or any other online gallery please use keyword CBC72 so we can find it.

Thursday, August 13, 2009

Happy Birthday Seahorse (CAS27 and FTTC28)

A good friend, and fellow diver, is having a birthday this week, so I made this seahorse birthday card for him. I had yet to use any of Stampin' UP!s new In Colors, so I pulled out my Bermuda Bay and Crushed Curry markers and textured card stock for this card. I colored the seahorse, from SU's Ocean Commotion set, all over with the Crushed Curry marker and then pounced the Bermuda Bay marker on top before I stamped the image.

I added alternating dots of the two colors around the border of the Nestabilities Labels Four die and layered that on a Crushed curry mat that was cut using a Labels Three die and then layered that on a Bermuda Bay mat cut using the next larger Labels Four die.

The background paper was made by inking my Cuttlebug Mesh Texture Embossing Folder with a Kaleidacolor Caribbean Sea inkpad before embossing the paper. I had a small strip of it leftover, so I matted it and used it on the front of the envelope. I added some score lines across the bottom, leaving space for my sentiment, and one at the top. I added a few rhinestones on either side of the main image and the sentiment and one for the seahorse's eye.

This was a quick and easy card and qualifies for this week's Clean and Simple challenge (CAS27)at Splitcoast Stampers, which is to add bling, as well as for this week's Flourishes Timeless Tuesday challenge (FTTC28), which is to score it.

Hope your week is going well! Thanks for looking!

Sunday, July 12, 2009

Have a Delightful Day!

This is my second entry for the Cornish Heritage Farms Summer Stamp Star Challenge. This is the second of five weekly challenges and it was paper piecing. Whew....who knew paper piecing could be so exhausting?? I'm worn out! This card was a lot of fun to play with, but it was a lot of cutting. I have a renewed love for my Cutter Bee scissors and tweezers!


I used three Shady Tree Studios flower stamps (Artsy Blooms, Closed Tulip and Iris Bloom) and several from the Saturday Evening Post Vintage Butterflies set for this card. The patterned paper is Stampin' Up!'s Tea Party collection and BasicGrey Urban Prairie and Boxer.

Many of the elements were popped up using different thicknesses of foam tape to give it a 3-D look. Here's a closeup to give you an idea of all the dimension. I used Stampin' UP!'s dimensionals for the thinner layers and Therm O Web foam squares for the thicker layers. I also used two different papers for each flower to give them a variegated look as well as some additional dimension.

The sentiment layer was also popped up with the foam squares. As I often say, much of my design is about covering up mistakes and that's how the sentiment came to be....I had a flub on my airbrushing and got some green on the blue and had to cover it up!


The butterflies were all stamped on the Urban Prairie Hayfield paper, cut out, covered with Glossy Accents to give them some stability.

Here's a closeup of the one I adhered to my bow. The ribbon is from Sharon Johnson's Stamp Simply Ribbon Store and is a dream to work with! I used the Bow Easy to make the bow - you can also get that invaluable tool through Sharon. The butterfly was adhered with a glue dot.


I cut out 2 of the ladybugs from the Hayfield paper (THAT was a challenge in and of itself!!), covered them with Glossy Accents and stuck them on top of my brads for the sentiment panel.

Sorry for the novel but there is a lot going on with this card! Thanks for hanging in here with me!
Hope your weekend is going well!

Friday, June 26, 2009

Friday Three-Fer

I wanted to post another card this week using my Quartet stamp from Repeat Impressions and when I saw this morning's Stamp Simply Challenge over at Sharon Johnson's blog, and the Flourishes Friday newsletter, I was all set with ideas! I also wanted to participate in Sharon's challenge in honor of my friend Jenny, who has just become a permanent member of Sharon's Stamp Simply team. Congrats, Jenny!

On to the details of my three-fer card:
1. Use the Repeat Impressions quartet stamp - check!
2. Sharon's challenge - use Grass Green and Sky Blue AND paper piercing - check! You can't see the piercing too well in the photo, but I pierced little triangles in all four corners of the patterned paper background and all around the black mat under the quartet image.
3. Flourishes Friday - use a solid stamp - check!

I stamped the Quartet image using Versamark on glossy card stock, then heat embossed it using clear embossing powder. Next, I masked each segment of the stamp and sponged Stampin' UP!'s Baja Breeze and Ranger's Peeled Paint Distress Ink in opposite corners. The patterned papers are from BasicGrey's Urban Prairie 6x6 paper pack and the ribbon is Baja Breeze striped grosgrain. My cute little bow was made using the Bow Easy, which you can get from Sharon's store.

If you haven't done so already, please sign up for a chance to win an unmounted sheet of four of these quartet stamps by leaving a comment on my blogoversary post from Tuesday. And check back Monday morning when I'll be announcing the winner!

Have a great weekend!

Thursday, June 25, 2009

Thinking of .... cooler weather!

Good morning! I thought I would show you another card I made recently using Repeat Impressions stamps. Wendy asked each of us to make a 'green' card, allowing us to interpret 'green' however we wanted. So I chose this Chickadee at Rest stamp (211-P), a Kraft card base and Rustic Wood buttons, thinking that it's green because of the pine needles, but also because of all the natural elements.

I started out by determining the right size oval Nestabilities die for my frame, then I colored directly on my stamp using Stampin UP! markers in Handsome Hunter, Chocolate Chip and Really Rust. After I stamped the image on the card, I taped my die to the card front, put a layer of scrap card stock on top of it, folded the back of the card on top, crossed my fingers and ran it through my Wizard with just the rubber embossing mat. It always makes me a little nervous doing this on a one layer card, for fear my die will move or I'll get unwanted indentations on the card (which is why I add the layer of scrap card stock), but it worked! Once I had that done, I used my white opaque pen to add a little frostiness to the pine needles and branch, and I used my Atyou Spica pens to add some shimmer to the pine needles and the chickadee's eye.

Next, I added some Papertrey Ink Rustic Jute Button twine to my Rustic Wood buttons, frayed the ends of the twine and adhered them in the corners with glue dots. Finally, I stamped the sentiment in the lower left corner, using a stamp positioner.
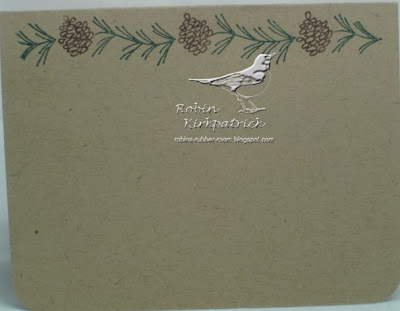
To keep the 'green' theme going, I also inked up this pine cone border (1506-M) stamp with the Handsome Hunter and Chocolate Chip markers and stamped it at the top on the inside of the card.

This was a quick, easy card to make, and it's helping me think of cooler weather - we're having some HOT temperatures here in Atlanta this week!

Finally, if you haven't already done so, please register for my blog candy giveaway by leaving a comment below on Tuesday's post. I'll be announcing the winner Monday morning. If you're going to be in the Orlando area this weekend, stop by the Repeat Impressions booth at Stampfest Orlando, say hi to Wendy and check out all their great stamps!

Have a great day and thanks for looking!

Monday, June 22, 2009

Flourishes Timeless Tuesday Inspiration Challenge

Last Tuesday the Flourishes Timeless Tuesday Challenge was an inspiration challenge. The challenge was to search through the posters from Kimberly Poloson on the Allposters.com web site and select one to use as your inspiration for a card. Only problem? I missed the whole 'Kimberly Poloson' part of the challenge, so I went to Allposters.com and just started looking through ALL the posters....there are a LOT of them! LOL! I had decided that I wanted to use the tulip from the Thank You set, so I narrowed my search to posters with tulips, and found this one that I knew would be perfect to go with this patterned paper- Memories of Sienna II. Off I went and made this first card.

Later, when I went to post the card for the challenge, I discovered the whole 'Kimberly Poloson' thing....so I started over! Back to Allposters.com to search again. This time I found this poster - Bel Bouquet I - that I thought would be great using the Sweet Peas set. So off I went to make this second card!


For the first card, the patterned paper is from Frances Meyer, the card stock is Papertrey Ink Kraft and Rustic White, and Prismatics Island Mist. Stamps are all from Flourishes (Birds and vine, and Thank you, and Ornamental Elements). The tulips were colored with Copic markers, cut out and popped up with foam tape. The flower images from Birds and Vines were stamped in the upper left and bottom left corners of the patterned paper and the main flourish from Ornamental Elements was stamped on the rustic white card stock behind the tulips. The ribbon is May Arts taupe silk from Sharon's Ribbon Store.

For the second card, the card stock is Papertrey Ink's Rustic Cream and Stampin' UP!'s Bravo Burgundy. I used a variety of stamps on this one - the backgrounds are Linen from Stampin UP! and Le London Script from Stampendous. The flowers are from Flourishes Sweet Peas set and were colored with Copic markers. The sentiment is from Flourishes' Flourished Words set. The ribbon is May Arts ivory silk that I colored with Antique Linen Distress Ink to match the card. The copper pearls are from Kaisercraft.

Hope you had a nice weekend! Please be sure to check back tomorrow for a chance to win some blog candy!