Showing posts with label Gina K. Designs. Show all posts

Thursday, February 23, 2012

You're Fintastic!


I made this card for this week's Pals Paper Arts PPA129 sketch challenge.  The fish image and sentiment are from Gina K. Designs Best Fishes set and the rope border image is from Waltzingmouse Stamps.  The patterned papers are from Graphic 45's Tropical Travelogue collection.

Thanks for stopping by!

Wednesday, October 13, 2010

Belli Challenge #102 - Pumpkins and Sketch!


Welcome to a new Belli Challenge!  This week's challenge is to make a card with pumpkins.  We also have an optional sketch for you to use if you would like:

For my card, I chose this adorable pumpkin kitty from There She Goes' Cattitude set.  I love the expression on this kitty's face!  I paper pieced the pumpkin body and colored the rest with Copic markers.  I created the bow around her neck using black twine, popped her up on foam squares and adhered her to a panel that was stamped using one of the images from Gina K. Designs Lovely Labels 2 set.  The sentiment is from There She Goes' Hauntingly Delightful set.

The main background paper is from Cosmo Cricket's Matilda collection and the diagonal and horizontal strips are from Reminisce (Esmerelda Stripe, Midnight Stripe and Jack Stripe).  The sentiment panel is anchored with a glittery pumpkin brad from Making Memories and a button that I tied using a small piece of raffia.  I think that covers it!

Head on over to the Creative Belli blog to find out more about the challenge and to see the wonderful pumpkin creations the rest of the team has created!  Enjoy the rest of your week!

Thanks for stopping by!

Tuesday, April 20, 2010

Cherry Pie in the Window!

Happy Tuesday!  I have a good friend whose daughter's dream is to be a pastry chef.  She's only 17, but she has her heart set on going to the Culinary Institute of America or Johnson and Wales and will be crushed if she can't.  I admire her for having such a passionate dream at such a young age.  I'll be 50 this year and I still don't know what I want to be when I grow up!

At any rate, I had a chef coat that I only wore once or twice and thought she would get more use out of it than I will, so I wrapped it up and sent it to her along with this little card.  The patterned paper is called Little Nibbles from Webster's Pages' Sweet as Cherry Pie collection.  It's matted with Papertrey Ink's Scarlet Jewel paper, on a Kraft card base that measures 3.75" square.

The Pie in the Window stamp is from Lockhart Stamp Company and seemed fitting for the occasion!  I colored the image with Copic markers and added some Sweet Pea Flower Soft to the window box.


Since my gift was intended to encourage her pursuit of her dream, I thought this quote was apropos for the inside.  It's from Gina K. Designs' Botanical Dreams set.

Hope your week is going well!  Thanks for stopping by!

Friday, April 2, 2010

Need a Hand?


Hello!  TGIF!  It's been a long week and I'm certainly glad it's Friday!  I have not had much stamping time in the last couple of weeks, so I'm looking forward to playing in my stamp room this weekend.

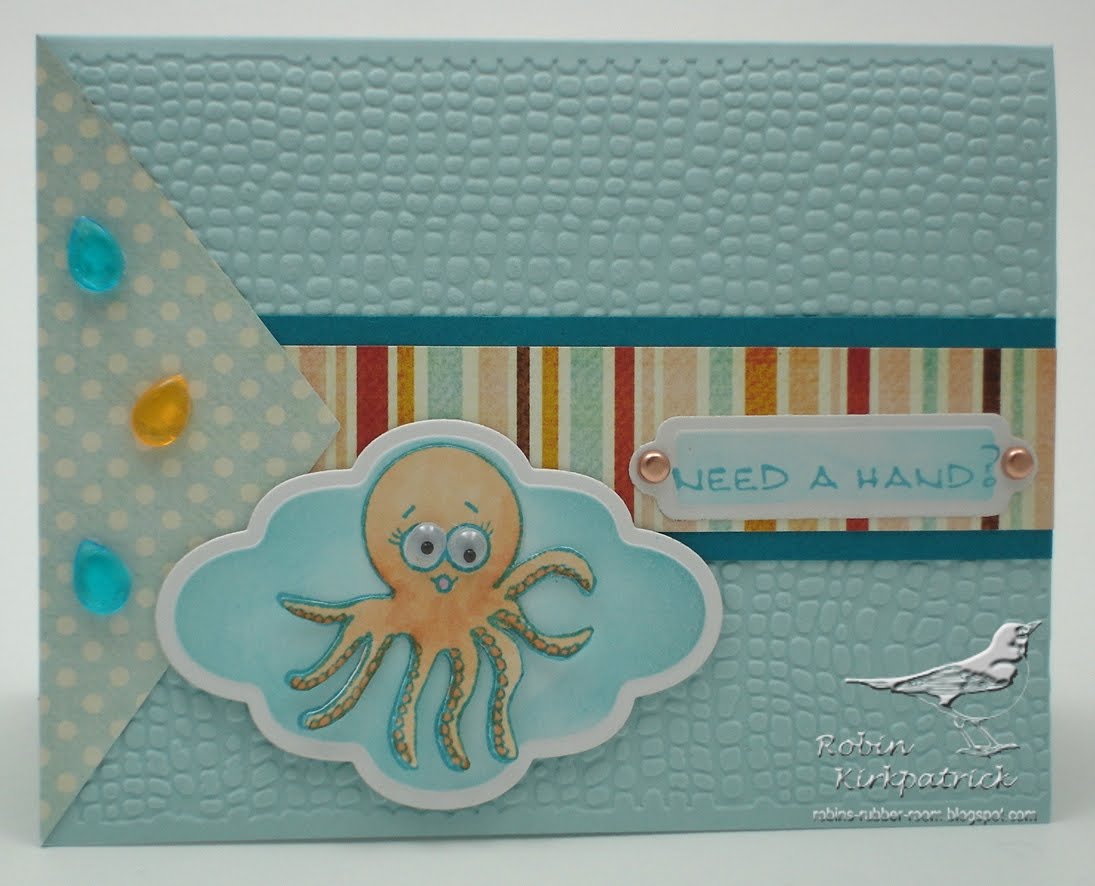
This is a quick card I made using a sketch from the current issue of Take Ten magazine.   The stamps are from Gina K. Designs' Just Keep Swimming set and some scraps of BoBunny Kitchen Spice papers.  I embossed my card base with a Cuttlebug Embossing Folder to mimic bubbles, added some teardrop shaped Dew Drops and added googly eyes to my little octopus.  He is popped up on the airbrushed panel with foam tape.  Very simple, but it makes me giggle!

Thanks for stopping by!  Have a wonderful weekend!

Thursday, January 7, 2010

Thank Ewe So Much!


Happy Thursday! Hope you are staying warm - it's 24 degrees here in not-so-Hotlanta. They are calling for snow this afternoon, which is a pretty rare occurrence here.

I made this card for Card Positioning Systems' CPS148 sketch challenge, which is sponsored by Gina K. Designs. The sheep and the sentiment are from Gina K.'s Down on the Farm set. They are paired with October Afternoon's Farm Fresh, Farm Yard paper - a match made in Heaven if you ask me! The sheep is stamped on an Inchie+ square (1 1/2 inches square), then I filled it in with some Liquid Applique. The doodles on the Inchie+ were done using a green Spica pen.

The striped ribbon is from Cosmo Cricket's Earth Love collection and the orange ribbon is from Martha Stewart. Pretty simple, but fun and I like the bright colors right about now!

Thanks for looking! Stay warm!

Monday, November 30, 2009

Fantastic Birthday

Happy Monday! This is a really quick card I made for my uncle's 91st birthday. I used Mercy's MTSC49 sketch, turned on its side, as my starting point.

The patterned papers are from BasicGrey's Boxer collection and the ledger paper is Creative Imaginations Narratives that I punched with an EK Success Binding Edge border punch. The stamps are from Gina K. Designs' Many Happy Returns set.

This is the closest I get to the mythical ten minute card... ;-) Thanks for looking!

Monday, October 5, 2009

WCMD Challenges

I had high hopes for spending all day Saturday in my stamp room playing along with the World Card Making Day challenges over at Splitcoast Stampers. There was a new challenge posted every hour from 10:00am to 11:00pm. It was a bit overwhelming and I learned that I am a very SLOW card maker! Some people made a card for each challenge during the hour the challenge was posted - how do they do that?? I barely figure out the stamps, papers and layout I'm going to use in an hour...sigh... I only managed to finish two cards for the challenges, plus a third card using a new toy I received on Friday, which I'll post another day.

This first card was made for the Crafty Secrets challenge, which was to make the card pop, using the image or an embellishment. I used a couple of images from the Feely Yucky set. I paper pieced the little nurse's uniform and popped up her arm with dimensional tape. The needle in her hand has Glossy Accents on it to give it a little pop, and I used a Cuttlebug folder to emboss the row of faux stitching on the red border strip. The background paper is from Jillibean Soup's Alphabet Soup collection and I thought it was perfect with the little nurse image since it reminds me of an eye chart.

The second card is for the Magnolia-licious Challenge, which was to make a Holiday Ornament - either an ornament to hang on the tree or a card with an ornament on it. I had this paper from BasicGrey's Eskimo Kisses collection so I used the ornament paper for part of the background and created an ornament as my focal point using a stamp from GinaK Designs Got Snow set. I cut the image out using a circle Nestabilities die and added a small square of silver paper, topped with a section of a scalloped circle to make the top of my ornament.

The image was colored with Copic markers and I masked it off and airbrushed the sky. I added some Polar White Flower Soft for the snow man and the ground, then added some Stickles for his buttons, nose, eyes and mouth. The sketch is from Jen del Muro's Sketch For You To Try (SFYTT) from Saturday.

That's it for this year's WCMD challenges for me - hopefully I'll do better next time! Thanks for looking and enjoy your week - we're getting off to a dreary, rainy start here.

Wednesday, September 2, 2009

Belli Challenge Wednesday!


Happy Wednesday! It's time for another Belli Challenge! This week's challenge is to use apples or pencils (back to school theme). The 'back t0 school' thing hasn't been part of my vocabulary for longer than I care to remember, and I had this apple paper in my stash, so I opted to make a card using apples!

The wheelbarrow of apples is from Gina K. Designs' Whimsical Autumn set and was stamped and colored on rustic white paper two times and the wheelbarrow portion was stamped once on Stampin' UP!'s wood paper. The wheelbarrow was cut from the wood paper and adhered to the rustic white paper. The apples were cut from the second sheet of rustic white and mounted using dimensional foam to give them a little depth.

The apple paper is from Die Cuts with a View, the sentiment is from Papertrey Ink's Vintage Picnic set and the green apple silk ribbon is from May Arts. I cut one of the apples from the paper and adhered it to the top of my bow.

To see what the other Belli Girls have created, please check out today's post on the Belli Blog. To play along with us, create a card or project using Apples, Pencils or a Back to School Theme, and share your link with us using Mr Linky over on the Belli Blog. We can't wait to see what you come up with. If you post to SCS or PCP or any other online gallery please use keyword CBC73 so we can find it.

Thanks for stopping by!

Thursday, July 30, 2009

Krafty Kat Kit cards

I have mentioned before that I am in a group of local stampers called the Krafty Kats. There are six of us and we get together each month to share our artwork and have a lot of laughs! We have such a good time together!

Each month one of us puts together a kit of papers and embellishments and then the next month we have 'show and tell' to see what everyone made with the supplies from the kit. It's always amazing how different all the cards are.

Today I'm showing three cards I made from a recent kit that Marcy put together. The patterned papers are from Heidi Grace Designs' Harvest Row collection. On the first card, I used the wicker chair image from Lockhart Stamp Company that Marcy had stamped and embossed for us. After I colored the image to match the paper, I drew a border around it while it was still in the square Nestabilities die, leaving space for the sentiment, which is from Amuse Artstamps. The bottom edge of the card front was cut and embossed with a Spellbinders Fancy Scallop Pierceability die.

For the second card, I used a photo stamp from The Stamping Studio. I stamped the pitcher of sunflowers on vellum with Black StazOn and then colored it on the back side using Copic markers. The image was cut out using deckle edged scissors.

I colored the paper flower in the bottom right corner using Copic markers and added the bead for the center to make it look like a sunflower. The sentiment is from Papertrey Ink's Mixed Messages set.

This last card includes stamps from Gina K.Designs' Botanical Dreams (the flower) and Papertrey Ink's Mega Mixed Messages (the sentiment). The 'leaves' under the bow/brad/flower combo were made using a Martha Stewart punch and were colored with a Copic Spica marker.

These kits are such fun to play with and it's always so interesting to see how everyone used the supplies included in them.

Hope you've had a good week - mine has been busy and I'm looking forward to the weekend!

Thanks for stopping by!

Wednesday, June 10, 2009

Belli Challenge - Happy Father's Day

This week I have the honor of being the Guest Designer over at the Creative Belli Challenge blog as a result of winning the May 13th color challenge with this card. The challenge for this week is to make a Father's Day card using the sketch provided.

I used Gina K. Design's King of the Grill stamp set and paper pieced the golf bag with Stampin' UP's Manchester patterned paper collection. The sky and grass were airbrushed with Copic markers. I stamped the golf clubs twice and cut them out, then cut a slit across the top of the golf bag and slid them in. I modified some white brads to make them look like golf balls by adding some light gray 'dimples' using my Copic markers.

For the inside of the card, I layered a matted strip of the patterned paper and added another set of golf clubs on top of that.

This was a fun card to make and it was great to experience being a guest designer for the first time! Thanks to the Creative Belli Blog ladies for giving me the opportunity!

Hope you're having a great week! Thanks for looking!

Thursday, May 28, 2009

Orchid Sympathy

Last week I needed a sympathy card for a good friend whose father passed away. I love this orchid from Gina K. Designs' Botanical Dreams set and think it's perfect for sympathy cards. It's a lot of fun to color and so versatile.

The orchid was colored with Copic markers to match the Memory Box Poppyfinch papers (sorry, I bought mine from Ellen Hutson but she seems to be out of it at the moment so I can't link to it), then I matted it with some teal card stock. Both layers were cut out and embossed using Long Rectangle Nestabilities die.

The sentiment is from Flourishes Flourished Words set and was cut out and embossed using a Square Nestabilities die and layered with foam tape on pink card stock that was cut out using a Labels One Nestabilities die. I layered two of the Poppyfinch papers on the teal card stock and wrapped some Martha Stewart ribbon around it, than adhered both stamped panels on top. I added some pink rhinestones to the corners of each panel and some blue pearls to the center of the flower on the patterned paper. The card base is 5 1/2" square textured olive card stock.

To the left of the card in the photo above, is the envelope, which I stamped and colored to match the card.

For the inside of the card, I added a layer of the striped paper I used on the front, matted with the teal card stock. I stamped and colored another orchid, then cut it out and adhered it on top of the striped panel. The sentiment is from Papertrey Ink's With Sympathy set and was matted on pink card stock. Both were cut and embossed using the long rectangles Nestabilities dies. That's about it!

Yesterday I learned that I won the Belli Challenge that I had created this card for, so that was some fun news! I'll be the guest designer over there in a couple of weeks, so stay tuned!

Hope you're having a good week! Thanks for looking!

Thursday, May 21, 2009

Wedding time

A friend asked me to make a wedding card for her to give to someone who is about to get married. It's always tricky to make a card for someone else to give since we all have different styles and ideas. She said she wanted it all black and white, so here it is!

I started with a pre-made white card base that had the embossed hearts on it. I knew I wanted to use this Gina K. Designs stamp of a wedding couple and I wanted to try my hand at stamping and embossing on vellum after seeing these cards my friend Sandy did.

I stamped the couple using Adirondack Snow Cap pigment ink on vellum and heat set it. I flipped the vellum over and placed it on a mouse pad and used my embossing tool to go over the stamped image from the back side of the paper. It makes the white really pop, especially when it's mounted on dark card stock. I cut the vellum using a Nestabilities oval die and then cut the black card stock and silver paper mats using the Labels Four Nestabilites.

The border on the black card stock strip on the right side of the card was cut using the Victorian Borderability die and layered on the white card base. A strip of silver and black striped card stock was added in the middle section and the matted image was placed on top.

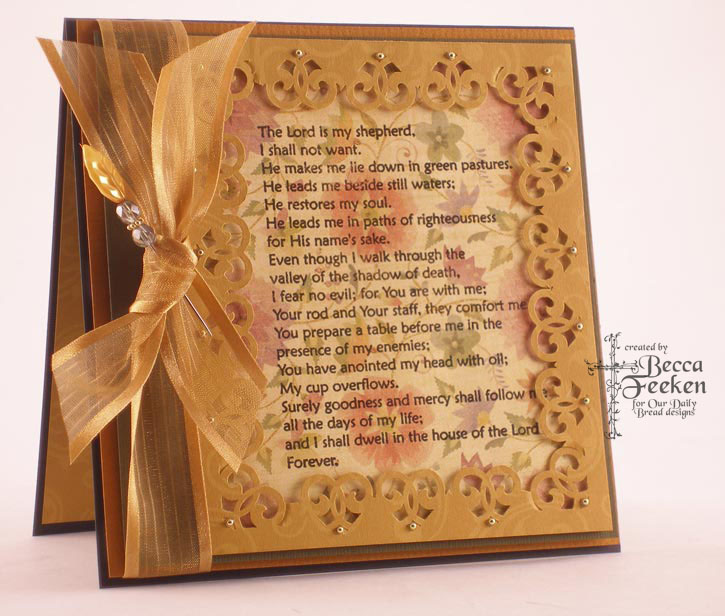
I have had the Stampin' UP! Pretties kit for some time, but haven't made much use of it, and love the stick pins I've seen used on other people's cards, like this one, this one and this one from Sharon Johnson and this one from Becca Feeken, so I thought I'd give it a shot. I started with the taffeta bow, then adhered the flowers on top of the bow and then assembled a few beads on the stick pin, pushed the pin through the knot in the bow and then added the remaining beads and the end cap.

After the card was all assembled, the black panel looked a bit bare, so I added some pearls in the top and bottom right corners and called it done.

I hope you're having a good week - mine has been busy and I've been making things I can't post here just yet, so sorry for the lack of activity! Thanks for looking!

Sunday, April 12, 2009

Happy Easter!


This is a quick Easter card I made using stamps from Gina K. Designs. The image was colored using Copic markers and the flower pot was paper pieced with some paper from the Die Cuts with a View Nana's Nursery Baby Boy paper pack. The background paper is from Making Memories' Flower Patch collection. The mat for the main image is Stardreams Stationery and the sentiment was cut out using a Spellbinders double ended tag. I ran some beautiful silk ribbon through it to match it up with the mat from the main image. I dabbed some Stickles on the flower centers and some Shimmerz on the eggs and that's about it!

Sorry for the poor quality of the photo, but I finished up the card while I was out of town for work last week and had to make do photographing it in my hotel room! Hope you have a Happy Easter! Thanks for looking!

Monday, February 23, 2009

Too much sympathy....

I have needed entirely too many sympathy cards lately. Last Wednesday, my very dear friend, Linda, called to say her husband, Bob, had died. I was shocked. Bob was one of the funniest people I have ever known.

The story of how we met Bob and Linda has always been one of my favorite stories to tell. None of us remembers exactly what year it was, but it was probably 15 years ago. Tim and I went to Seattle for a conference he was attending. As a side trip, we decided to spend the weekend on San Juan Island at a bed and breakfast. The B&B, Hillside House, had an aviary and all of the room names were bird-themed. I recall there being one that was the only suite on the third floor, and it was called Robin's Nest. I wanted to stay in that room, needless to say! Unfortunately, it was already booked, so we took a different room. When we arrived and mentioned to the owners that were from Atlanta, they said there was another couple staying there from Atlanta. And THEY were in the Robin's Nest.

So, the next morning at breakfast, the owners introduced us to the other Atlanta couple - and it was Bob and Linda. We hit it off immediately and have been friends ever since. Linda even loaned me her very nice rain jacket that day since they were leaving, and we were going on a whale watching excursion. She said we would just have to get together when were all back in Atlanta so I could return it to her. Shortly after we returned home, I heard that Hillside House was for sale. I just did a quick search and found that it's still there, but now the third floor suite is called the Eagle's Nest.

We are so very thankful that we had them over for dinner and to spend the night with us a couple of weeks before Christmas. We had such a good time together.

The card above is the one I made for Linda because she commented on this card that she loved the background paper. I have been planning ever since to make her next birthday card with it, and this Gina K. Designs stamp, but it seemed really well suited for a sympathy card, too.

And, as if that weren't enough sadness for one week, last night we received the call that we have been dreading for the last year or so. My mother-in-law passed away yesterday. She was a wonderful, caring person who welcomed me into the Kirkpatrick family with open arms almost 25 years ago. She had been in deteriorating health for a while, but when we spent Christmas with her, she seemed to have rallied and be doing better. Tim, his brother and sister, and all the spouses have been planning a visit to see her and take her out to dinner next month to celebrate her 80th birthday, which would have been March 16th.

Sorry to have a downer of a post today, but that, unfortunately, is life sometimes. Thanks for 'listening'. Hug your loved ones....

Tuesday, February 10, 2009

Comfort and Peace

I found myself in need of a couple of sympathy cards last week, so I did something I don't do very often and made the two cards using the same materials, at the same time. I started out selecting the stamps I wanted to use - Gina K.'s Comfort and Peace set.

For both cards, I used Cosmo Cricket Gretel Butterflies patterned paper and butterflies that were cut using a Martha Stewart punch. I selected different embellishments for each card, as well as making them different sizes. The first card is 5 1/2" square, and the second card is a standard A2 (4 1/4" x 5 1/5") card.

On the first card, I stamped the images using three colors of Ranger Adirondack dye inks (Rust, Latte, Espresso) and cut the image and a mat for it using my Labels One Nestabilities. The sentiment and its mat were cut using my Long Rectangles Nestabilities. I added some crocheted lace from my stash and some velvet Cosmo Cricket ribbon to the bottom, with a couple of pewter leaf brads inserted through the two layers of ribbon.

For the second card, I made my base using Papertrey Ink Kraft card stock and added a layer of Eames Painting Canvas Brown Umber card stock, which has a nice texture to it. For this one I just stamped a single flower image with Adirondack Rust ink and airbrushed the background with a Copic marker while it was still in the die.

At the bottom of the card, I added a layer of plain twill with another layer of velvet flower ribbon on top. The sentiment was also stamped with the rust ink and airbrushed and was adhered, with its mat, on top of the two layers of ribbon.

I added a few dew drops in the upper right corner and called it done. Sympathy cards are never fun to make, but hopefully they provide some 'comfort and peace' to the recipient.

Hope you're having a good week! Mine's been busy so far.

Thanks for stopping by!

Monday, January 12, 2009

Happy Birdie

Happy Monday! I've been a bad blogger this past week - sorry about that! I was out of town for work last week and just didn't find the time to post anything. Hopefully this week will be better!

I recently needed a birthday card for one of the men in my family. He is a golfer, as is obvious from the card! Nothing says golfer like plaid, right? So, I had the bright idea to paper piece the golf bag. Paper piecing is fun, but when you're working with some of these little pieces, it gets a bit tricky and time consuming!

I stamped the golf bag image four times - on white, tan, and green paper and on the plaid paper. I colored in the clubs and the metal hardware on the strap with my Copics on the white version. Everything else is paper pieced. I started with the tan bag and strap and added the other pieces on top. It was really a lot of fun to 'design' this golf bag, but I don't think I'll do another one any time soon! The border of the panel with the golf bag was colored with a gray Copic marker, and then I used my colorless blender to make the dots - I was trying to mimic the dimples on a golf ball.

The golf ball - the round piece on the felt ribbon - was run through my Swiss Dots embossing folder once, then I rotated it in the folder and ran it through my Wizard again to add more dots. I adhered it 'wrong' side up (debossed side) to simulate the dimples of a golf ball.

I think the rest is self-explanatory. Hopefully he got a chuckle out of it!

Thanks for looking and hope you have a great week!

Card Details:
Patterned paper: Stampin' UP! Manchester DSP
Card stock: Stampin' UP! Whisper White, Very Vanilla, Baja Breeze; tan and green from my stash
Ink: Memento Rich Cocoa
Stamps: Gina K. Designs (golf bag), Savvy Stamps (sentiment)
Misc.: Stampin' UP! felt ribbon; Copic markers; Nestabilities; Swiss Dots embossing folder

Wednesday, November 19, 2008

When a man loves a woman...


This card was made for a friend who was recently married. At this stage of my life, I don't have many opportunities to do wedding cards, so this was fun. It also provided me with a great opportunity to play with a few new things. The first piece of the card was actually the bow. I saw Becca's tutorial on making a bow and threading the ribbon through the back of it and wanted to try that out. I had just purchased this beautiful double sided satin ribbon, so I used that. The pointed tails of the ribbon are cut off in the photo, unfortunately.

The other new toy I had recently purchased was the Cuttlebug folder I used to emboss the white background paper. I really like the pattern and it seemed perfect for a wedding card.

I'm embarrassed to say that I've owned this stamp set from Gina K. Designs for quite some time, but it had never met up with an ink pad, so this gave me an opportunity to use it. The wedding couple stamp really makes a nice, clean impression.

Finally, I pulled out my Copic airbrush with my new compressor (a birthday present from my hubby - thanks, honey!!) and masked the image of the couple so I could airbrush the background. It was really hard to get a good photograph of this card and show the contrast between the gray and the white, but it looks really nice in person!

I used my ticket corner punch to notch out the corners of the embossed white paper and placed some KaiserCraft pearls in the corners. That's about it for this one!

Tom and Helen, I wish you a long and HAPPY life together!

Thanks for looking!

Card details:
Paper: Stamper's Anonymous Matte Postcard; Stardreams Stationery
Stamps: Gina K. Designs
Ink: Memento Tuxedo Black
Misc.: ribbon, Kaisercraft Bliss pearls, Cuttlebug embossing folder, Copic Markers and airbrush system

Friday, September 26, 2008

Comfort & peace

Happy Friday! Boy am I glad this week is almost over. I'll be even more glad when I'm feeling 100%. My sore throat turned into a full blown head cold and I was miserable Wednesday night and all day yesterday, but I'm feeling a bit better today, so hopefully I'm on the mend.

This is a card I made recently for a friend whose mother passed away. I love this color combination and thought it was good for a sympathy card. It was also my submission for last week's sketch challenge over at Splitcoast Stampers. I stamped the flower image using two Colorbox Cat's Eye ink pads and stamped the sentiment using the same ink pad as the flowers. The panel was cut out and embossed with my long rectangle Nestabilities dies and the border panel was cut out using my Perfect Layers ruler set. I aged the panel with some Ranger Distress Inks and mounted it with some foam tape on top of the other panels that were affixed to a kraft cardbase. The panels on the card base were also aged with Distress Inks.

There isn't a lot to this card in terms of techniques, but the tricky part for me with cards like this is selecting coordinating papers and getting the panels all the right size and mounted straight and even.

I'm hoping to be feeling better over the weekend so I can get some stamping in since I've only made one card this whole week. Hope your week has been better than mine and that you have a good weekend!

Card Details:
Pattern Paper: Prima Tea & Silk Collection Daigoji; Prism Island Mist; BasicGrey Two Scoops
Card stock: PTI Kraft
Stamps: Gina K. Designs
Inks: Colorbox Cat's Eyes - Sea Glass & Stucco; Ranger Distress Inks - Antique Linen & Vintage Photo

Thursday, September 11, 2008

Got Snow?

I love the way this little card turned out. The paper is from October Afternoon - they have some terrific papers. I'm not sure why, but as soon as I saw it, I knew I wanted to do a winter-themed card. I also took this opportunity to play with my Copic airbrush system.

I stamped the image on Papertrey Ink Stamper's Select White and colored it with my Copic markers. I cut it out with a circle Nestability die, and while it was still in the die, I masked the image and airbrushed the sky in blue, then took it out of the die, masked the top portion and airbrushed the grass. The edges were distressed with Ranger Antique Linen Distress Ink. The scalloped mat is the reverse side of the patterned paper and was cut out with a scalloped Nestability die.

The card base is Papertrey Ink Kraft card stock. I wrapped the ribbon around the patterned paper, and adered it to the card base. I stamped the sentiment and cut it out with a Spellbinders label die. While it was still in the die, I airbrushed it with the same markers as the sky and then distressed it with the Antique Linen ink. I also distressed the ribbon with the Antique Linen ink to tone it down and keep it more in line with the vintage look of the rest of the card. It was attached to the ribbon with two brads and then I adhered the bow to the ribbon strip with some glue dots. That's about it!

It's been a long, busy week for me - hope yours has been good! I'm looking forward to getting some stamping time in this weekend. Happy Friday and have a great weekend!

Card Details:
Patterned Paper - October Afternoon
Card stock - Papertrey Ink Kraft card stock and Stamper's Select White
Stamps - Gina K. Designs
Markers - Copic
Inks - Memento Rich Cocoa; Ranger Distress Ink - Antique Linen
Other - brads, ribbon -Fancy Pants