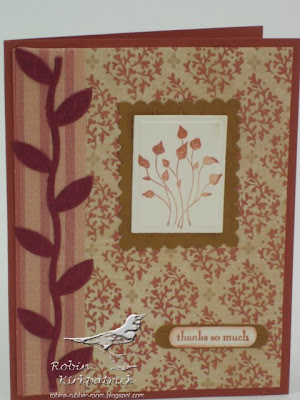
I made this card a while back to showcase this gorgeous Italian paper that I received from Krafty Kat friend, Barb. I'd link you to Barb's gallery or blog so you can see her wonderful creations, but she doesn't have either....Come on, Barb, you should share your talent! ;-)
Anyway, I just loved this paper, especially the beautiful bird, so I cut out this portion of it using my Labels One Nestabilities. Then I created each of the mat layers using the next larger sizes.
The only stamping on this card is the sentiment, which I stamped with Versamark and embossed with detail gold embossing powder.
I wrapped some ribbon around the black card base, adhered all my label layers on top, tied a big bow and it's done! Not much to it, but I think it turned out nicely.
You can also see that I put a little strip of the Italian paper on the inside to tie it all together. This is one of those cards that I will have a difficult time parting with, although I did just find some more of this beautiful paper, so maybe I'll make a few more like it.
Hope you're having a good week. I've got a sick spouse - he started coming down with a bad cold on Sunday and spent most of yesterday in bed. Poor baby had to go to work for a meeting this morning, but will probably be back in bed as soon after as possible. I'm doing what I can to take care of him, but stay away from him at the same time! I cannot afford to get sick now...
Thanks for stopping by!
Card Details:
Paper: Rossi Florentine Print - Phoenix; red handmade paper, gold and vanilla card stock
Stamp: Stamp Camp
Ink: Versamark
Misc.: Ribbon - Offray; gold detail embossing powder, Spellbinders Label One Nestabilities
Tuesday, January 20, 2009
Thursday, January 15, 2009
More card folders!
Here are another couple of card folders I made as Christmas gifts. By the time I got to these two, I was running out of time, so these folders and the cards that went with them are more uniform than the other ones I've shown.
For these two, I used my JustRite Stampers round Monogram stamper with the Special Occasions font and border, and the Small Letters set. I used Stampin' Up! Bella Rose Designer Series Papers and Riding Hood Red ink. The folder and cards were made using Very Vanilla, Riding Hood Red and Pink Pirouette card stock.
I think they are pretty self-explanatory. This first photo shows the cover of the folder and the next photo shows the opened folder with the cards inside.
Next is the second folder cover. The nice thing about the JustRite stamper is all I had to do was change out the letters for the name and, voila, I was ready to go with another personalized stamp.
This one was made using So Saffron and Baja Breeze Patterns Designer Series Paper and Baja Breeze, More Mustard and Very Vanilla card stock.
Here is the open folder. The monogram circles were stamped with Baja Breeze and So Saffron inks. All matchy-matchy!
That's about it for these two. Hope you're having a good week - I'm glad it's almost over! Thanks for looking!
Labels:
Card Folders,
JustRite Stampers,
Stampin' UP
Monday, January 12, 2009
Happy Birdie
Happy Monday! I've been a bad blogger this past week - sorry about that! I was out of town for work last week and just didn't find the time to post anything. Hopefully this week will be better!
I recently needed a birthday card for one of the men in my family. He is a golfer, as is obvious from the card! Nothing says golfer like plaid, right? So, I had the bright idea to paper piece the golf bag. Paper piecing is fun, but when you're working with some of these little pieces, it gets a bit tricky and time consuming!
I stamped the golf bag image four times - on white, tan, and green paper and on the plaid paper. I colored in the clubs and the metal hardware on the strap with my Copics on the white version. Everything else is paper pieced. I started with the tan bag and strap and added the other pieces on top. It was really a lot of fun to 'design' this golf bag, but I don't think I'll do another one any time soon! The border of the panel with the golf bag was colored with a gray Copic marker, and then I used my colorless blender to make the dots - I was trying to mimic the dimples on a golf ball.
The golf ball - the round piece on the felt ribbon - was run through my Swiss Dots embossing folder once, then I rotated it in the folder and ran it through my Wizard again to add more dots. I adhered it 'wrong' side up (debossed side) to simulate the dimples of a golf ball.
I think the rest is self-explanatory. Hopefully he got a chuckle out of it!
Thanks for looking and hope you have a great week!
Card Details:
Patterned paper: Stampin' UP! Manchester DSP
Card stock: Stampin' UP! Whisper White, Very Vanilla, Baja Breeze; tan and green from my stash
Ink: Memento Rich Cocoa
Stamps: Gina K. Designs (golf bag), Savvy Stamps (sentiment)
Misc.: Stampin' UP! felt ribbon; Copic markers; Nestabilities; Swiss Dots embossing folder
Labels:
Gina K. Designs,
Stampin' UP
Tuesday, January 6, 2009
Another card folder
This folder was the first one I created a few months ago. My stamp group gets together once a month and for each meeting we take turns putting together a kit containing papers and embellishments. The following month when we get together, we show what we made using the kit. This card folder was made using the papers and embellishments from one of those kits.
The patterned papers I used are a mix of Cosmo Cricket and Frances Meyer. The folder was made using Papertrey Ink's Kraft card stock and the card bases were made using either Prism Desert Coral or the Kraft card stock. The stamps are from the Stampin' Up! Pocket Silhouettes set. At the time I made this one, I was still thinking that I would make a bunch of themed folders, so all of these cards are thank you cards. I had decided not to give this folder away as a gift for a couple of reasons, and now that I need some thank you notes for Christmas, I will just be using these cards!
I love this leaf ribbon from May Arts and thought it matched up with this stamp really well.
I stamped a few of the flowers in the set on the bottom of this patterned paper.
For this card, I was able to incorporate several of the embellishments from the kit, including the flower, the ribbon, the photo turn and the brads.
This one includes some scraps from the other cards, along with a chipboard scalloped circle that I covered with a flower from the patterned paper.
Hope you're having a good week so far! Thanks for looking!
Labels:
Card Folders,
Cosmo Cricket,
Frances Meyer,
Papertrey Ink,
Stampin' UP
Sunday, January 4, 2009
Happy Anniversary
Several months ago, a friend asked me to make a card that she could buy to give to a couple she knows for their 25th wedding anniversary at the end of January. Did I jump right on it? Of course not! So here it is January and amidst all the other cards I'm obligated to make right now, I also had to come up with a special anniversary card for her. One of these days I'm going to learn to stop procrastinating....
So, here it is. I struggled with this one and ended up having to re-do almost all of it, but overall I'm happy with the way it turned out. The heart image is one I bought from Stamp Camp at last year's Heirloom Pro show, and since it's almost time for this year's show, I figured that stamp ought to see some ink. I stamped it with the new Versamark Dazzle ink, then heat embossed it with silver embossing powder. The happy anniversary stamp is from Cornish Heritage Farms' Script Essential Expressions set. After I cut the heart out (oooh, that sounds bad...), I decided it needed a black border, so I stamped the image again on black paper and cut it out, leaving about 1/8th of an inch all around to create the mat layer.
I embossed part of the silver paper with my Cuttlebug Swiss Dots embossing folder and then scored several lines across the middle, 1/8th inch apart. I used my ticket corner punch for all four corners and added some black Heidi Swapp bling in the corners and through the middle.
Now my question - what do you think would be a fair price to charge for a card like this? I struggle with this as I will never be able to charge enough to actually make any money on my cards, but I don't want to just give them away either. So, let me know what you think.
Thanks for stopping by!
Card details:
Patterned paper: from my stash (no name on it)
Card stock: Papertrey Ink Silver Shimmer card stock; Cryogen White
Stamps: Stamp Camp; Cornish Heritage Farms
Ink: Versamark Dazzle
Misc.: Ribbon - Michael's or Hobby Lobby, not sure which; Silver embossing powder - JoAnn's; Bling - Heidi Swapp
Labels:
Cornish Heritage Farms,
Papertrey Ink,
Stamp Camp
Thursday, January 1, 2009
Honey Pie Card Folder
This is the front of the second in my series of card folders. This folder and card set were made using Cosmo Cricket's Honey Pie paper collection. I love these papers!
It was at this point that I realized I wasn't going to be able to do the themed folders I had intended, so this one doesn't have a sentiment stamped on the front like the last one did, and each card has a different sentiment. This is really a more versatile approach, but I still like the idea of doing multiple folders with each one being for a different occasion (birthday, thank you, thinking of you, sympathy, etc.). Someday maybe I'll work that out!
The ribbon on this folder is Martha Stewart's seam binding ribbon. It's pretty thin ribbon, but I think that makes it easier to tie a bow. The thick twill I used in the last folder was also Martha Stewart, but it was difficult to tie into a nice bow. Since these are going to people who are not paper crafters or bow tying aficionados, this thinner ribbon is better. I also learned that you need to be sure to cut the ribbon long enough to make it easy to tie a bow, which I didn't really do on the first folder.
This is the card folder open, showing all of the cards and envelopes.
I used the same stamps for this folder as I did for the last one, except that each card has a different sentiment.
I had some coordinating Cosmo Cricket ribbon that I used on this card.
Each of the envelopes was stamped with the same image as the card, using Stampin' UP!'s So Saffron ink. I really like all the different colors in this paper collection.
I hope you had a fun and safe New Year's Eve and wish you a very happy 2009! I have to admit that 2008 was a pretty wonderful year for me, especially related to my paper crafting hobby, so I'm not sure how 2009 can be any better, but time will tell!
Thanks for stopping by and Happy New Year!
Card details:
For the coordinating envelope for this card, if I remember correctly, I didn't stamp a good image, so I just covered it up with coordinating paper instead. I've said it many times - most of my projects are an exercise in hiding a mistake of some sort!
I hope you had a fun and safe New Year's Eve and wish you a very happy 2009! I have to admit that 2008 was a pretty wonderful year for me, especially related to my paper crafting hobby, so I'm not sure how 2009 can be any better, but time will tell!
Thanks for stopping by and Happy New Year!
Card details:
Patterned paper: Cosmo Cricket Honey Pie
Card stock: Stampin' UP! Regal Rose, Rose Red, Mellow Moss, So Saffron; Prism Natural Smooth
Ink: Stampin' UP!
Markers: Copic - R000, R11, R21, R35, R85; Y30; YR00; YG03, YG95; G94, G99
Stamps: Stampin' UP! Flores Suaves and Bloomin' Beautiful; Papertrey Ink; Denami Designs; Stampendous
Labels:
Card Folders,
Copic,
Cosmo Cricket,
Papertrey Ink,
Stampin' UP
Subscribe to:
Posts (Atom)